基于微信事件二维码推广
本文最后更新于:2021年6月15日 晚上
前言
之前写了一篇关于推广系统设计的博客,在那篇博客中介绍了统一的推广地址生成的方法,只举例说明了一种推广的方式,本篇博客讲解另外一种推广方式,基于微信事件二维码的方式。需要注意的是,事件二维码只有服务号有此接口权限,订阅号是没有该接口权限的,当然如果没有服务号的话,想学习一下接口的使用,微信官方提供的测试号可以使用该接口。
谈谈事件二维码
二维码的便利性毋庸置疑,尤其是在微信中可以通过长按识别的方式识别二维码,让二维码的使用更加便捷频繁。微信推出的事件二维码大大提高二维码的交互能力,以下内容摘自官网介绍。
为了满足用户渠道推广分析和用户帐号绑定等场景的需要,公众平台提供了生成带参数二维码的接口。使用该接口可以获得多个带不同场景值的二维码,用户扫描后,公众号可以接收到事件推送。
事件二维码可以产生事件,并且二维码是可以携带参数的,这就可以用作推广。比如我司,针对某一本书的某一章节生成事件二维码,用户扫描二维码后,如果未关注公众号,会进入关注公众号页面,方便用户进行关注,关注后,后台接收到微信的事件推送,得到了存储的书与章节的信息,则可以直接发送消息,引导用户进入推广的章节页面,以下为我司微信推广的流程图。

创建事件二维码
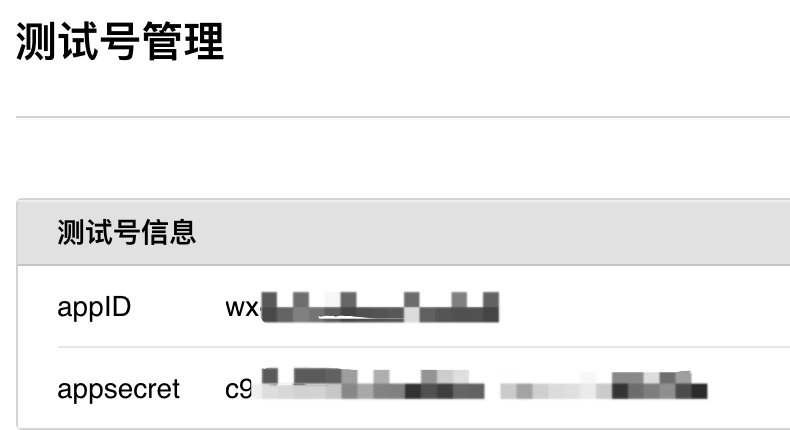
为了便于演示,我的项目是基于 SpringBoot 搭建。本项目使用的是微信测试号,可以在此处进行申请 **微信测试号**。appID 与 appsecret 在微信测试号中可以得到。
之前在公司写这套推广系统的时候,都是自己看微信公众平台文档,自己写的基础代码,比如封装请求参数,参数拼接,最近在 Github 上发现了一个封装得不错的 微信开发 SDK,对微信的开放平台、公众平台、小程序都有对应的子项目。秉着不重复造轮子的原则,我们引入这套 SDK,也就无需自己再进行封装了,还可以学习封装的源代码。
首先添加 Maven 依赖,这里引入操作微信公众号的 SDK
1
2
3
4
5<dependency>
<groupId>com.github.binarywang</groupId>
<artifactId>weixin-java-mp</artifactId>
<version>2.8.0</version>
</dependency>然后配置微信公众平台参数 appID 与 appsecret,
新建微信平台配置信息 Properties1
2
3
4
5
6
7
8
9
10
11
12
13
14
15import lombok.Data;
import org.springframework.boot.context.properties.ConfigurationProperties;
import org.springframework.stereotype.Component;
@Data
@Component
@ConfigurationProperties(prefix = "wechat")
public class WechatProperties {
private String appId;
private String seecret;
private String token;
}application.yml 中添加 appID 与 appsecret
1
2
3
4wechat:
appId: wx1234567890
seecret: c912345678900987654321
token: QAnEo9760zDywWMvTKCxx创建微信配置类,声明两个 Bean。
1
2
3
4
5
6
7
8
9
10
11
12
13
14
15
16
17
18
19
20
21
22@Component
public class WeChatConfig {
@Resource
private WechatProperties wechatProperties;
@Bean
public WxMpService wxMpService() {
WxMpService wxMpService = new WxMpServiceImpl();
wxMpService.setWxMpConfigStorage(wxMpConfigStorage());
return wxMpService;
}
@Bean
public WxMpConfigStorage wxMpConfigStorage() {
WxMpInMemoryConfigStorage wxMpConfigStorage = new WxMpInMemoryConfigStorage();
wxMpConfigStorage.setAppId(wechatProperties.getAppId());
wxMpConfigStorage.setSecret(wechatProperties.getSeecret());
wxMpConfigStorage.setToken(wechatProperties.getToken());
return wxMpConfigStorage;
}
}创建 WechaptService 以及其实现类
1
2
3
4
5
6
7
8
9
10
11
12
13
14
15
16
17
18
19
20
21
22
23
24
25
26
27
28
29
30
31
32
33
34
35
36
37
38
39
40
41
42
43
44
45
46
47@Service
public class WechapServiceImpl implements WechatService {
@Resource
private WxMpService wxMpService;
/**
* 创建永久事件二维码
* @param param 附加的参数
* @param needShortUrl 是否转换为短链接
* @return 微信二维码地址
*/
@Override
public String createQrCode(String param, boolean needShortUrl) {
WxMpQrcodeService qrService = wxMpService.getQrcodeService();
try {
WxMpQrCodeTicket ticket = qrService.qrCodeCreateLastTicket(param);
String url = qrService.qrCodePictureUrl(ticket.getTicket(), needShortUrl);
return url;
} catch (WxErrorException e) {
e.printStackTrace();
}
return null;
}
/**
* 创建临时事件二维码
* @param param 附加的参数
* @param expireSeconds 有效时间 单位为秒,最大2592000(即30天)
* @param needShortUrl 是否转换为短链接
* @return 微信二维码地址
*/
@Override
public String createTempQrCode(String param, Integer expireSeconds, boolean needShortUrl) {
WxMpQrcodeService qrService = wxMpService.getQrcodeService();
try {
WxMpQrCodeTicket ticket = qrService.qrCodeCreateTmpTicket(param, expireSeconds);
String url = qrService.qrCodePictureUrl(ticket.getTicket(), needShortUrl);
return url;
} catch (WxErrorException e) {
e.printStackTrace();
}
return null;
}
}可以看到,简单的几行语句就可以生成事件二维码了。这里的参数 param 就是附加到二维码中的参数(可以放入推广相关参数,如推广链接ID),用户扫描后,微信服务器会推送相应的事件,可以在事件参数中可以获得 param。
创建 Spring Junit 测试该方法,生成事件二维码
1 | |
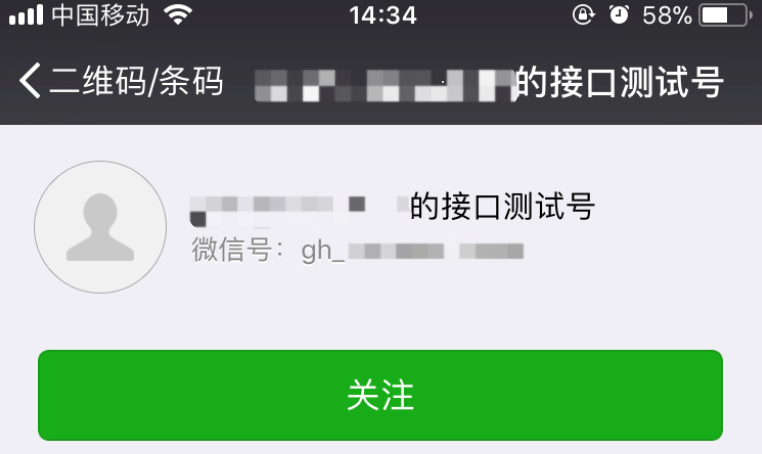
- 打开生成的二维码链接,短链接 URL 格式如: https://w.url.cn/s/xxxxx 使用微信进行扫描,会进入提示关注的页面。

接收微信事件推送
参数二维码已经生成了,但是你发现扫描关注之后,神马事情也没有发生,说好的发送消息呢!这是因为你没有接收微信的扫码关注事件推送和对其进行处理呢。
创建 Controller 用于微信接口请求校验,然后启动项目
1
2
3
4
5
6
7
8
9
10
11
12
13
14
15
16
17
18
19
20
21
22
23
24
25
26
27
28
29
30
31
32
33
34
35
36
37
38
39
40
41
42
43
44
45
46
47
48
49
50
51
52
53
54
55
56
57
58
59
60
61
62
63
64
65
66
67
68
69
70
71
72
73
74
75
76
77
78
79
80
81
82
83
84
85
86
87
88@Controller
@RequestMapping(value = "/wechat/auth")
public class WeChatController {
@Autowired
private WxMpService wxService;
@Autowired
private WxMpMessageRouter router;
@GetMapping(produces = "text/plain;charset=utf-8")
public void authGet(
@RequestParam(name = "signature",
required = false) String signature,
@RequestParam(name = "timestamp",
required = false) String timestamp,
@RequestParam(name = "nonce", required = false) String nonce,
@RequestParam(name = "echostr", required = false) String echostr,
HttpServletResponse response) {
if (StringUtils.isAnyBlank(signature, timestamp, nonce, echostr)) {
throw new IllegalArgumentException("请求参数非法,请核实!");
}
if (this.wxService.checkSignature(timestamp, nonce, signature)) {
try {
response.getWriter().print(echostr);
} catch (IOException e) {
e.printStackTrace();
}
} else {
return;
}
System.out.println(1111);
}
@PostMapping(produces = "application/xml; charset=UTF-8")
@ResponseBody
public String post(@RequestBody String requestBody,
@RequestParam("signature") String signature,
@RequestParam("timestamp") String timestamp,
@RequestParam("nonce") String nonce,
@RequestParam(name = "encrypt_type",
required = false) String encType,
@RequestParam(name = "msg_signature",
required = false) String msgSignature) {
if (!this.wxService.checkSignature(timestamp, nonce, signature)) {
throw new IllegalArgumentException("非法请求,可能属于伪造的请求!");
}
String out = null;
if (encType == null) {
// 明文传输的消息
WxMpXmlMessage inMessage = WxMpXmlMessage.fromXml(requestBody);
WxMpXmlOutMessage outMessage = this.route(inMessage);
if (outMessage == null) {
return "";
}
out = outMessage.toXml();
} else if ("aes".equals(encType)) {
// aes加密的消息
/*WxMpXmlMessage inMessage = WxMpXmlMessage.fromEncryptedXml(
requestBody, this.wxService.getWxMpConfigStorage(), timestamp,
nonce, msgSignature);
WxMpXmlOutMessage outMessage = this.route(inMessage);
if (outMessage == null) {
return "";
}
out = outMessage
.toEncryptedXml(this.wxService.getWxMpConfigStorage());*/
}
return out;
}
private WxMpXmlOutMessage route(WxMpXmlMessage message) {
try {
return this.router.route(message);
} catch (Exception e) {
e.printStackTrace();
}
return null;
}
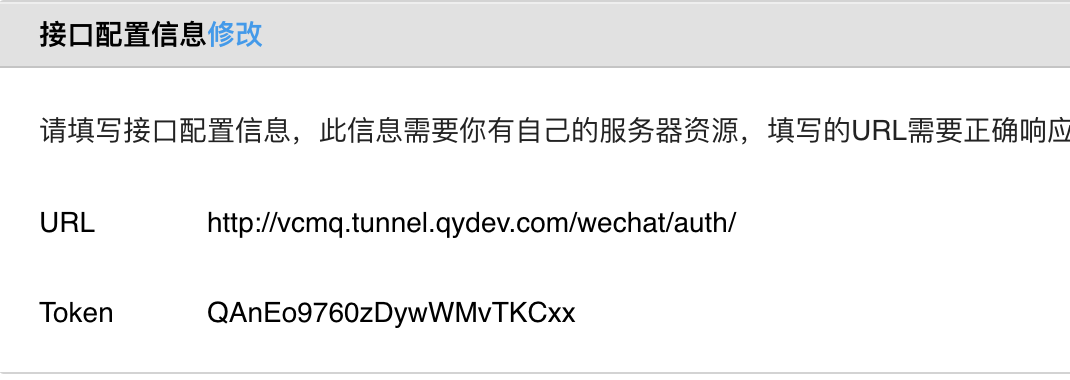
}设置微信消息推送接口,用于接收微信推送的请求,这里需要填写外网域名,如果你有自己的服务器和域名,可以直接填入;如果你没有,可以使用 ngrok 进行内网穿透,得到一个外网域名。

比如我的微信请求校验地址为127.0.0.1:8080/wechat/auth, 通过内网映射转发后得到的外网地址为http://vcmq.free.ngrok.cc/wechat/auth,填写这个域名, Token 用于校验服务器,之前的 yml 文件中已指定了 token 的值,填写该值即可,点击确认。微信扫描事件二维码,微信服务器推送请求到 post 方法,调用 route 方法,进行处理。
事件二维码文档地址事件KEY值,qrscene_为前缀,后面为二维码的参数值。
可以针对这种情况的进行处理。
1 | |
资源下载
参考
本博客所有文章除特别声明外,均采用 CC BY-SA 4.0 协议 ,转载请注明出处!